Backblaze 45 Terabyte 4U Custom Storage Pods(12/24/08) by the Backblaze Server Team |
Explanation: Backblaze has the concept of a "storage pod", which is defined as a "good way" of organizing one CPU, one gigabit network card, and some number of hard drives to store customer data on. We strive for reliability and low cost. We take into account ALL FACTORS such as power, space, raw parts cost, maintainability, etc. Below is the storage pod design we are using as of 12/24/08 which houses 45 one terabyte SATA drives attached to a 3.3 GHz Core 2 Duo Intel processor, one power supply driving the whole thing, all wrapped in a custom metal 4U rack-mounted red pod case. Backblaze had the red pod case custom designed out of sheet metal just for us because we could not find anything "off the shelf" that achieved this drive density at this price. All the rest of the computer components are "off-the-shelf", we didn't design any circuits or have any circuit boards custom manufactured for us. We just chose carefully and plugged it all together. The storage pod runs a free distribution of Linux, with Apache Tomcat as a web server to accept encrypted customer files over HTTPS and lay them down onto a JFS file system. The 45 drives are organized into RAID6 groups of 9 drives each (so 5 groups total), where we can lose any 2 drives of the 9 in one group and not lose any data. Below is an wiring diagram of how the components logically plug together:
The cost of a 45 terabyte storage pod is about $7,000 of which $4,500 pays for the hard drives (each terabyte drive is currently $100). One storage pod can accept about 250 MBits/sec sustained (for weeks at a time) of files over HTTPS (which happens to be about 500 users actively backing up) with the CPU running at 80 percent and the JVM of Tomcat using about 1 GB of RAM all to itself (we wrote all our own buffering software in Java to buffer files a certain way to maximize disk throughput).
Notes About SATA Cards and Compatibility: The Intel motherboard we use comes with 5 or 6 SATA connectors, so at first glance it would appear we did not need any of the 2 port PCIe SATA cards. However, when we tested the configuration without using the PCIe SATA cards, the performance was unexplainably much worse (about 1/5th the disk read and write performance). Our solution was to buy the PCIe cards which had the same SATA communications chip manufacturer (Silicon Image) that the Port Multiplier boards had, and with this new configuration all the performance was excellent. Also, in the above diagram notice we use one regular "PCI" port (for the 4 port PCI SATA card) while the other 3 cards are in "PCIe" which is faster. The only reason is that we ran out of PCIe slots on the motherboard. Either way, both PCI and PCIe are MUCH faster than disk rates so for our application using one PCI card did not create a bottleneck.
Notes About RAID6 Configuration: We configure the drives into RAID6 volumes containing 9 drives in a volume, where we can lose any 2 drives and still maintain full data integrity. If you look at the wiring diagram above, we try to minimize our single points of failure. Keeping that goal in mind, it's important *WHICH* drives (H1 - H45 in the diagram above) are in which RAID6 group. We want a system where we can lose one of the SATA Port Multiplier Backplane boards and the pod is still fully functional with all data. We do this by making one RAID6 group contain one hard drive from *EACH* of the 9 Port Multipler Backplanes. Example: The first group of 9 drives is made up of: H1,H6,H11,H16,H21,H26,H31,H36,H41.
Click on any picture below for a LARGER, higher quality version.
Below is a picture of a totally empty Backblaze red pod case. We designed this ourselves, and they are manufactured for us by a firm in Canada (ProtoCase, http://www.protocase.com) in small runs of 10 units for about $800 each. The circuit board in the picture below is a $42 "SATA Port Multiplier Backplane" that takes a single SATA connection and allows 5 hard drives to be plugged into the board standing vertically in the red pod case. I set one example circuit board in the picture below to show how each board must be screwed into the stand-offs to accept the hard drives. We buy the SATA Port Multiplier Backplanes directly from a supplier in Taiwan.
![]()
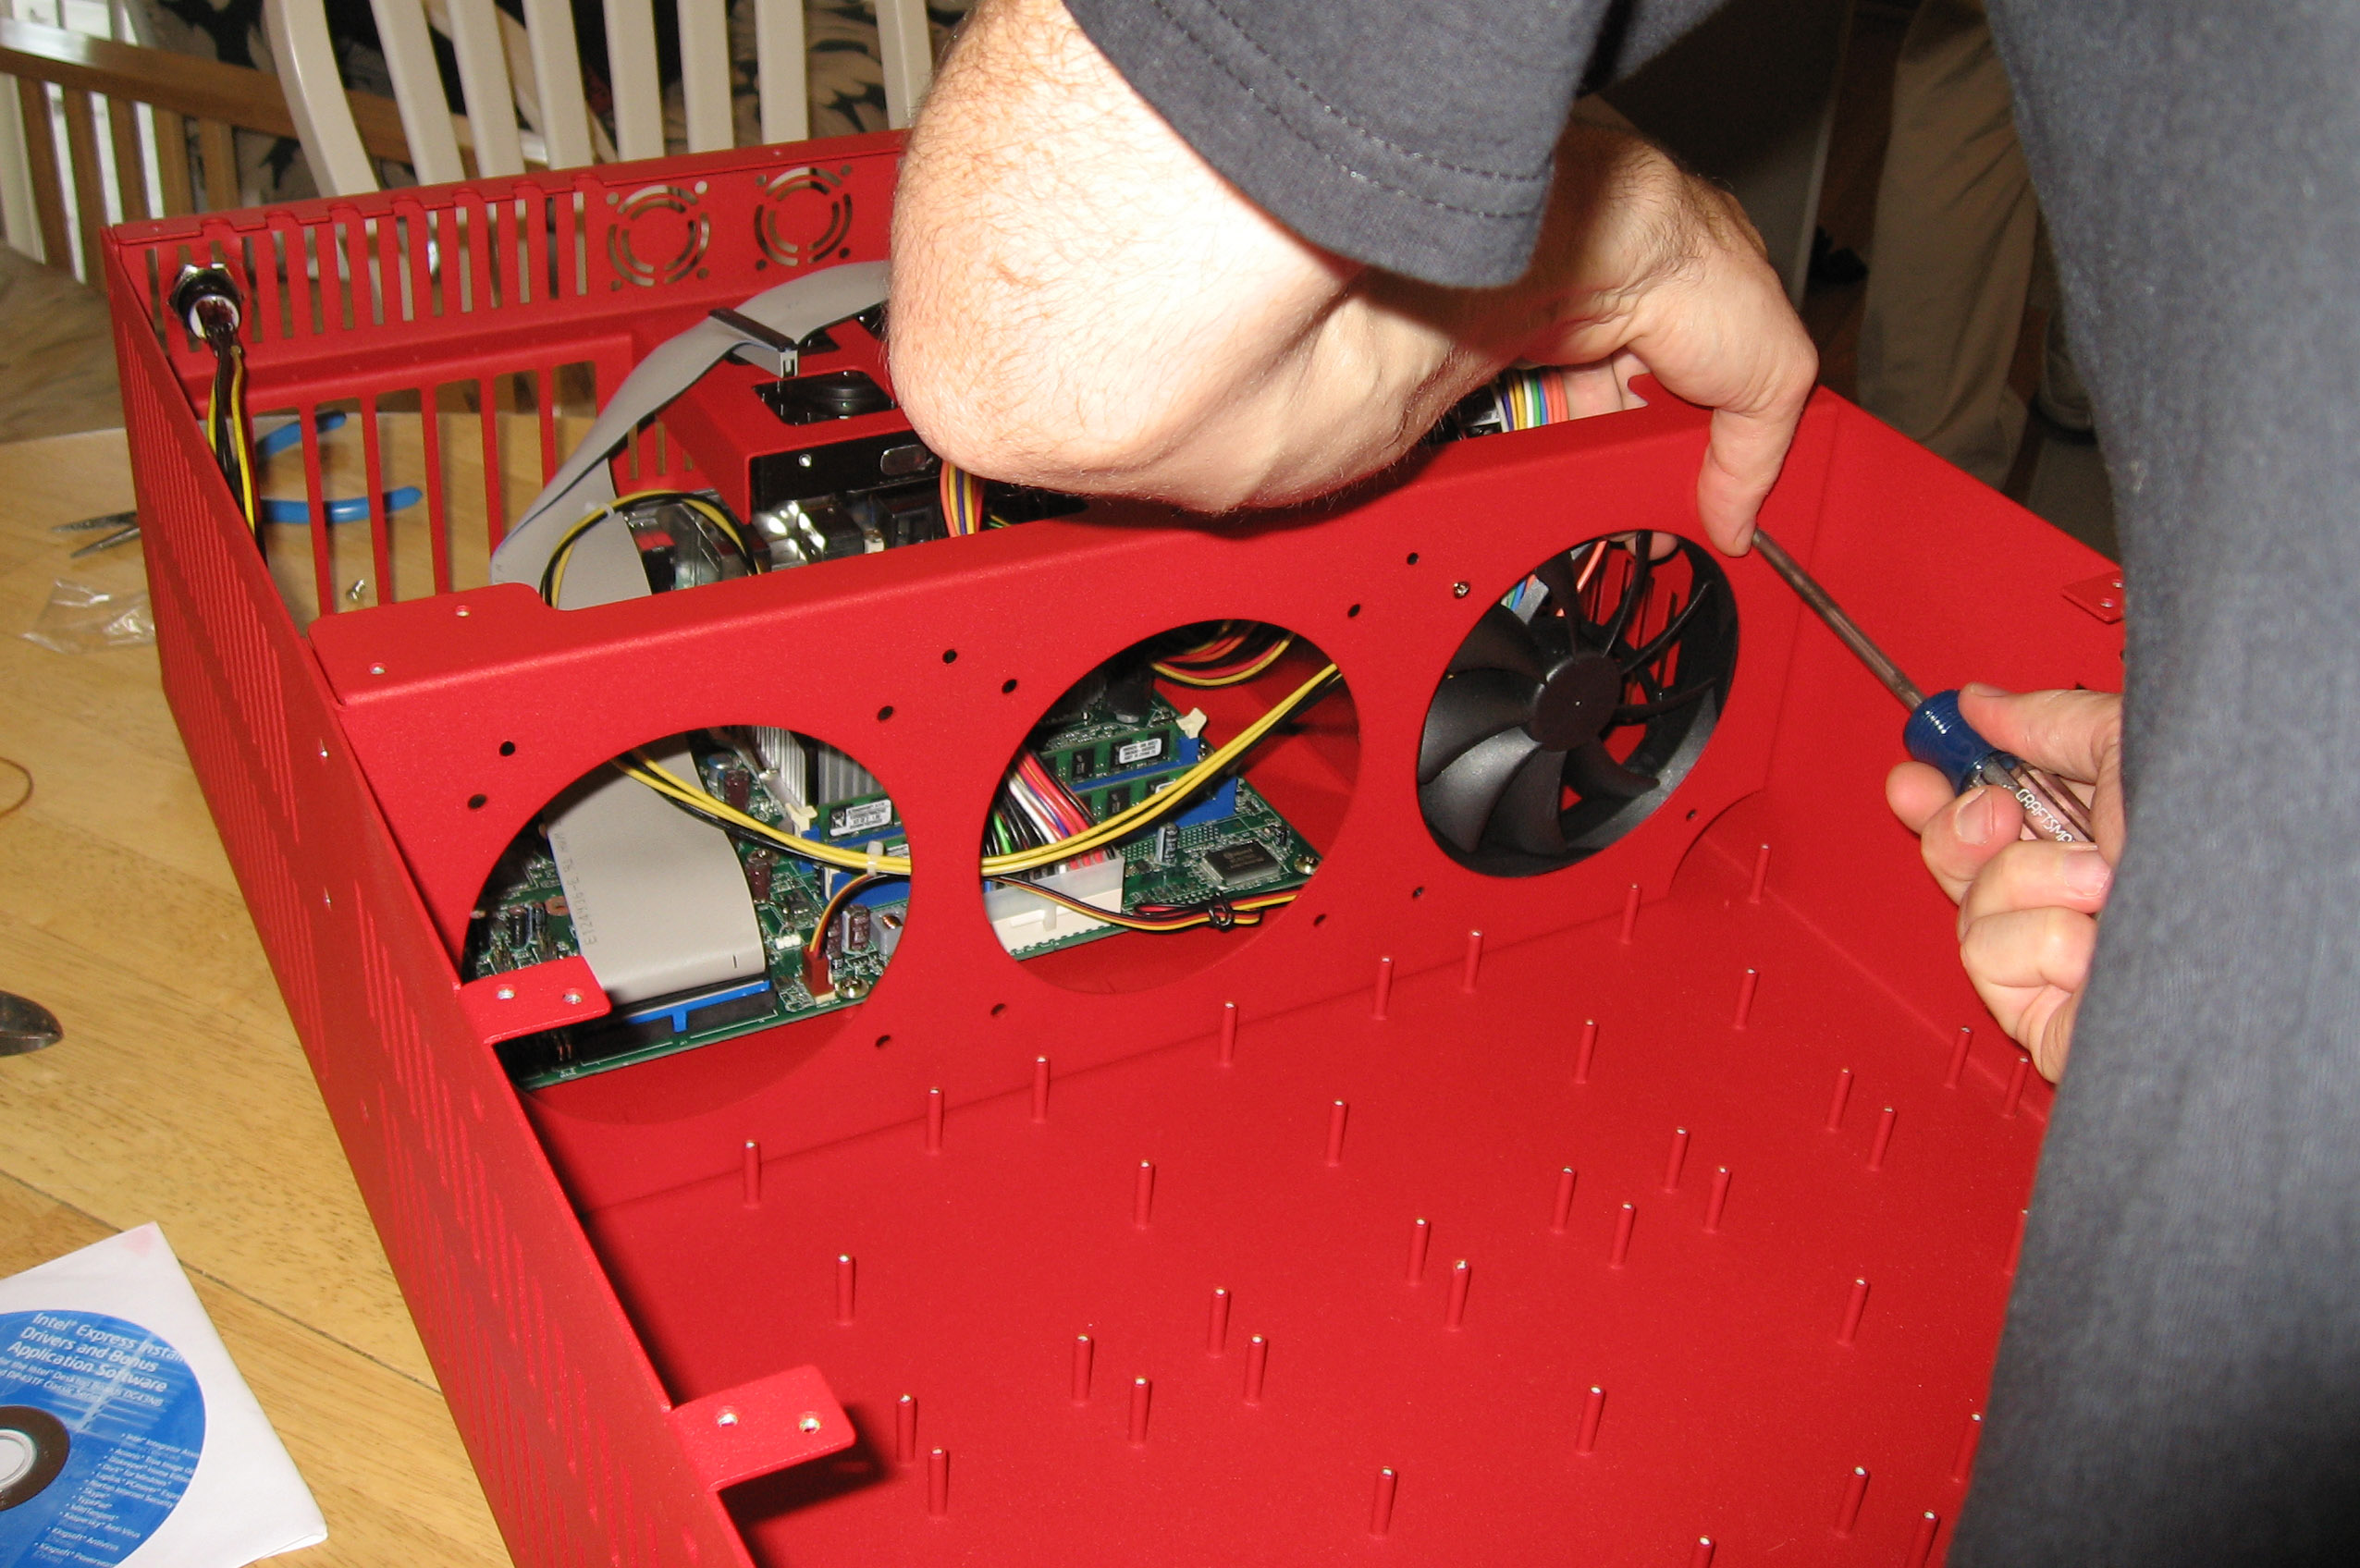
Below is the pod with motherboard installed but none of the Port Multiplier Backplanes or drives installed yet. Notice the 3 big holes right in the very center of the red pod below. Those hold 3 "120mm Slipstream 1900 RPM" fans ($8 each) that pull air past the hard drives and blow it over the motherboard section to keep the whole thing cool. The first of three fans is being installed in the picture below.
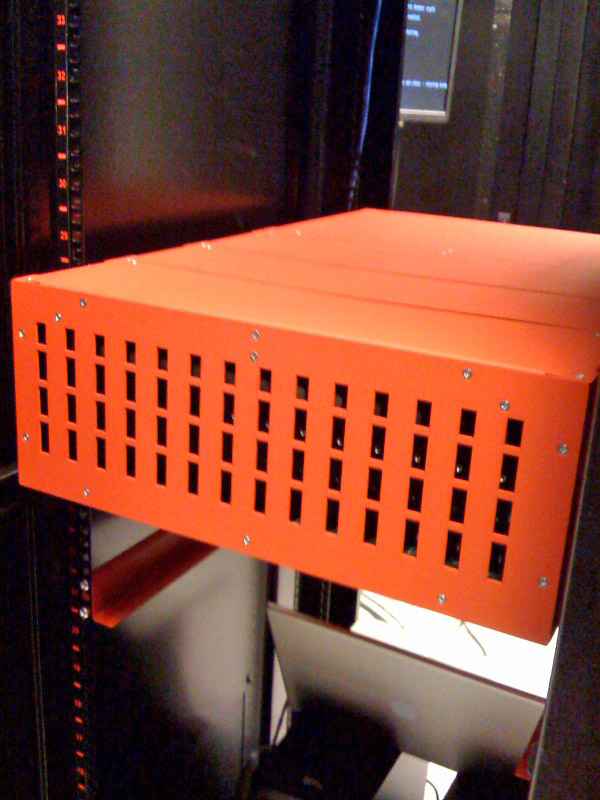
The picture below is a fully assembled pod that does not have any drives installed yet. (The "orange" tint below is from a lower quality cell phone camera.) This whole thing fits in a 4U datacenter rack. When a drive fails (needs to be replaced), you slide the whole storage pod out like a drawer and replace the bad drive from the top of the drawer and slide it back in.

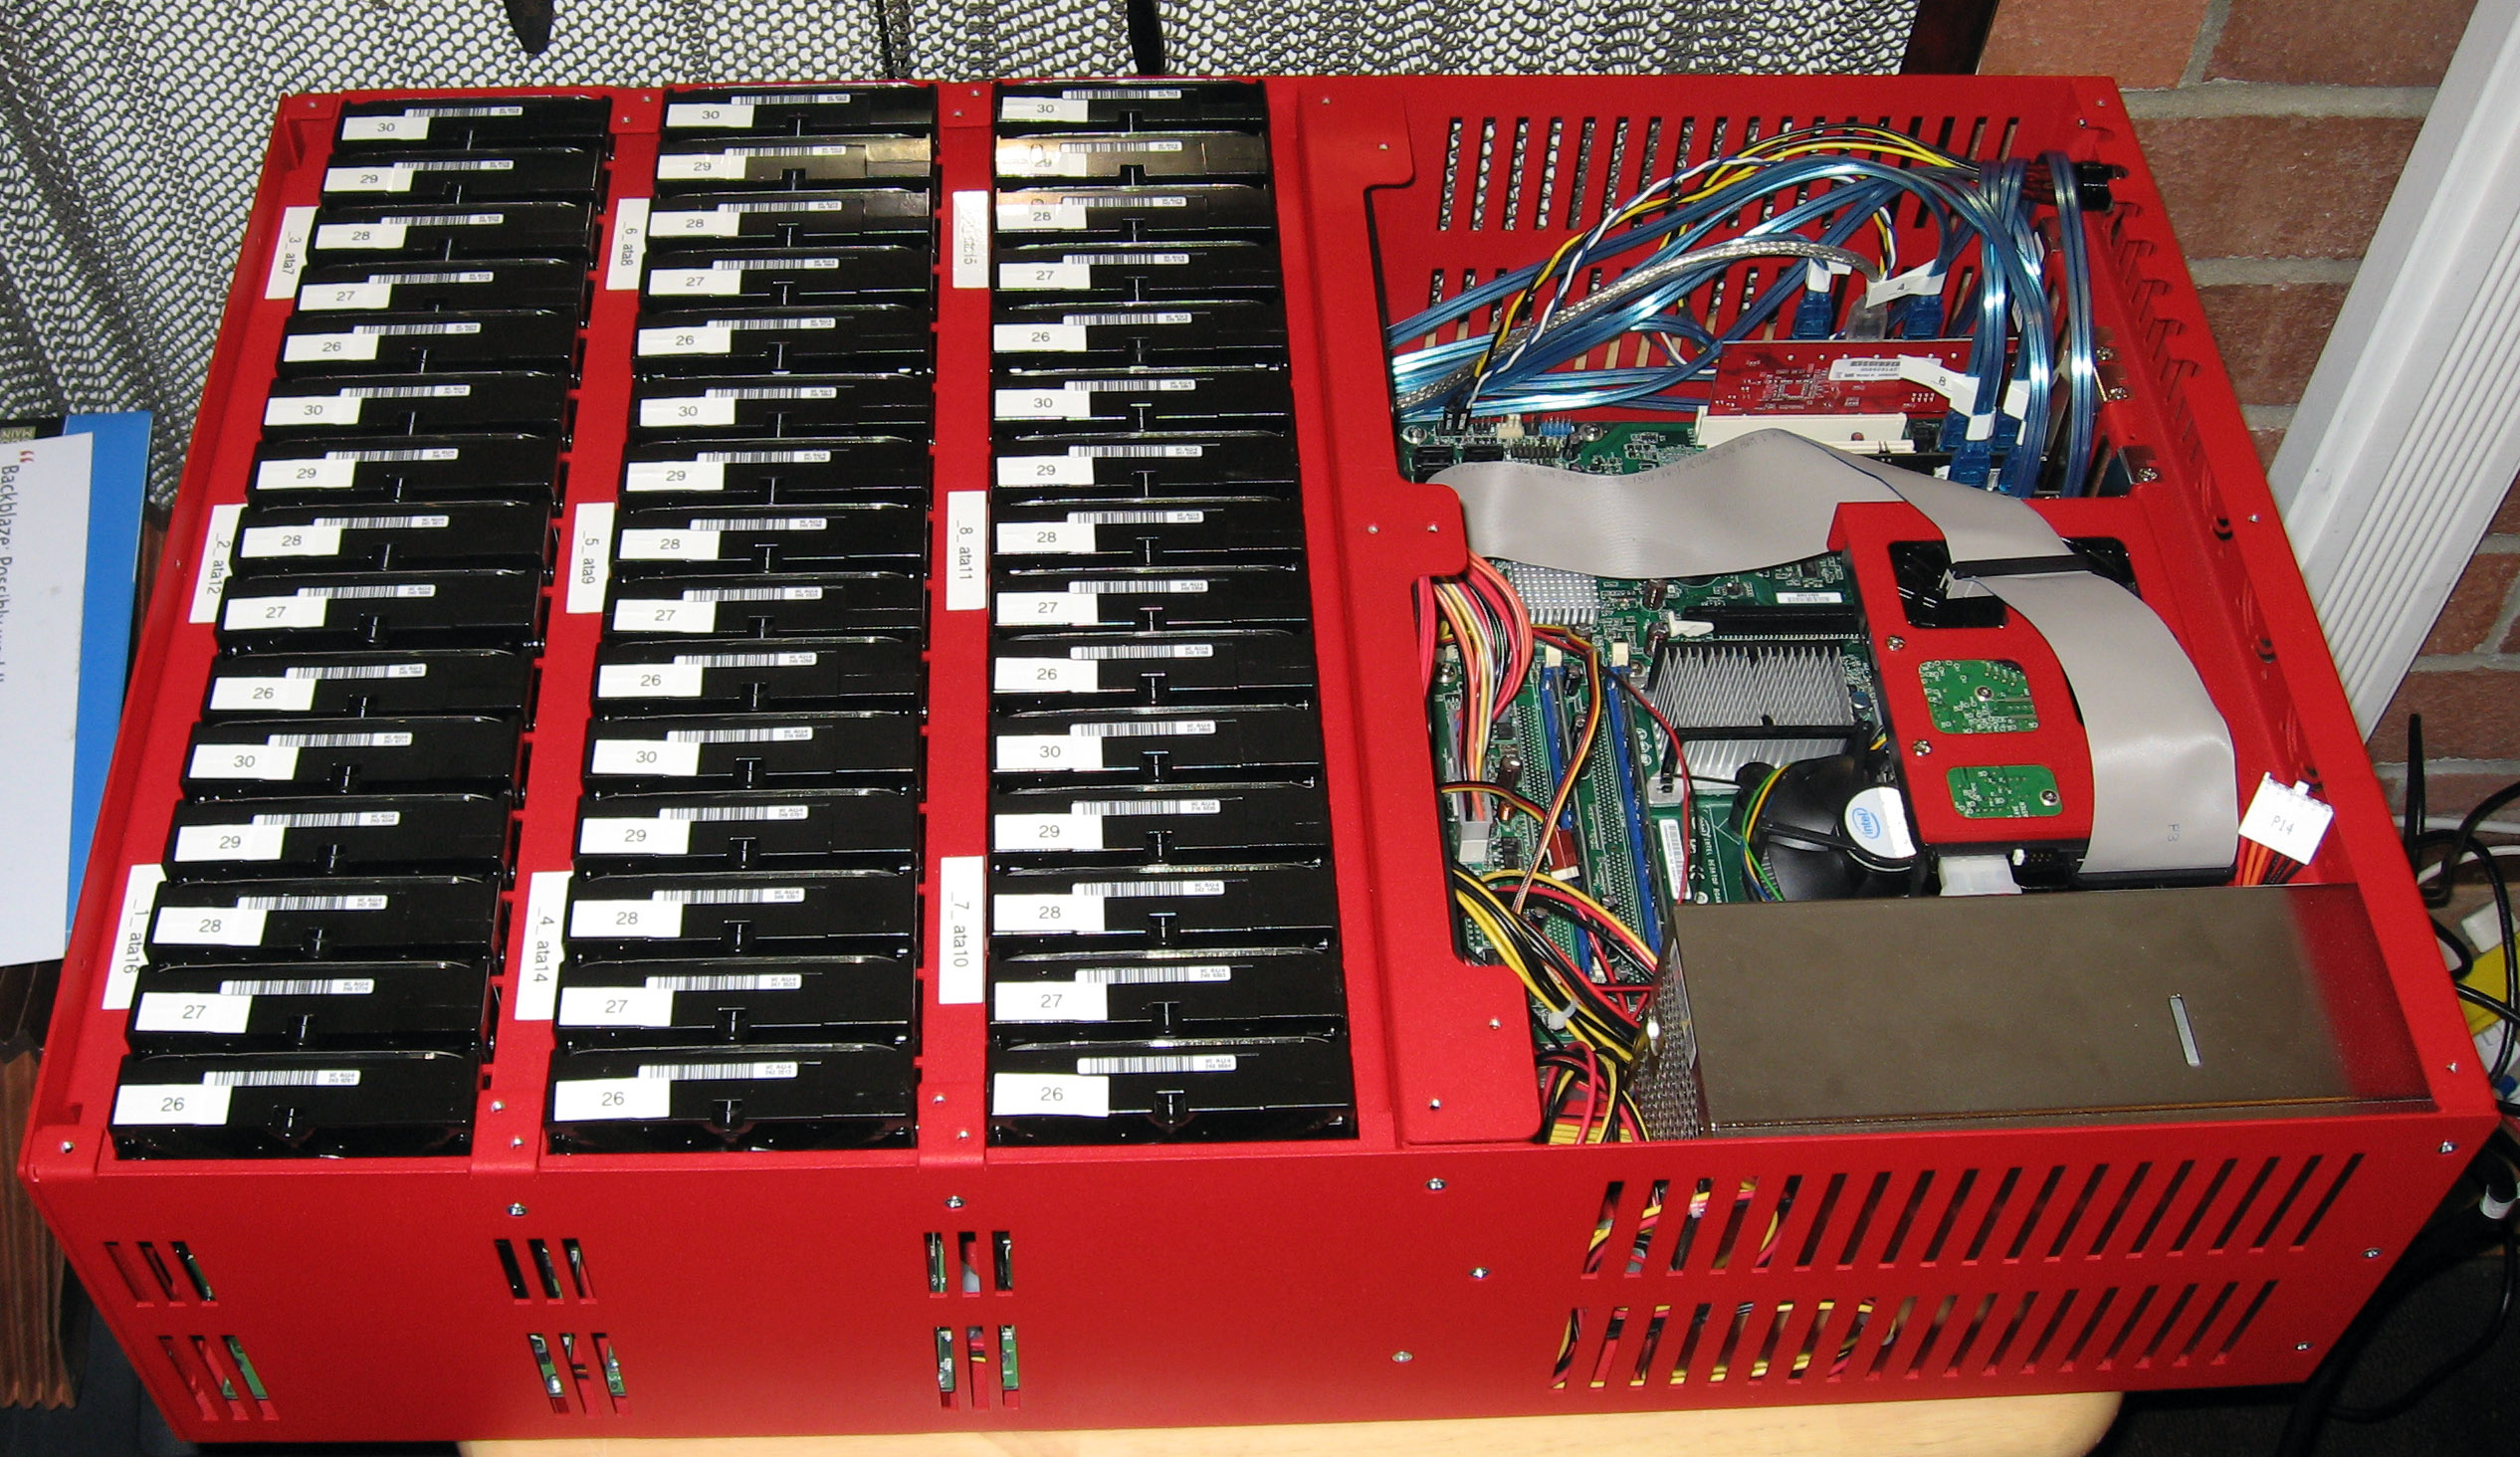
Below is a fully assembled red storage pod filled with the 45 hard drives (each is a one terabyte drive). It is missing the top cover plates.
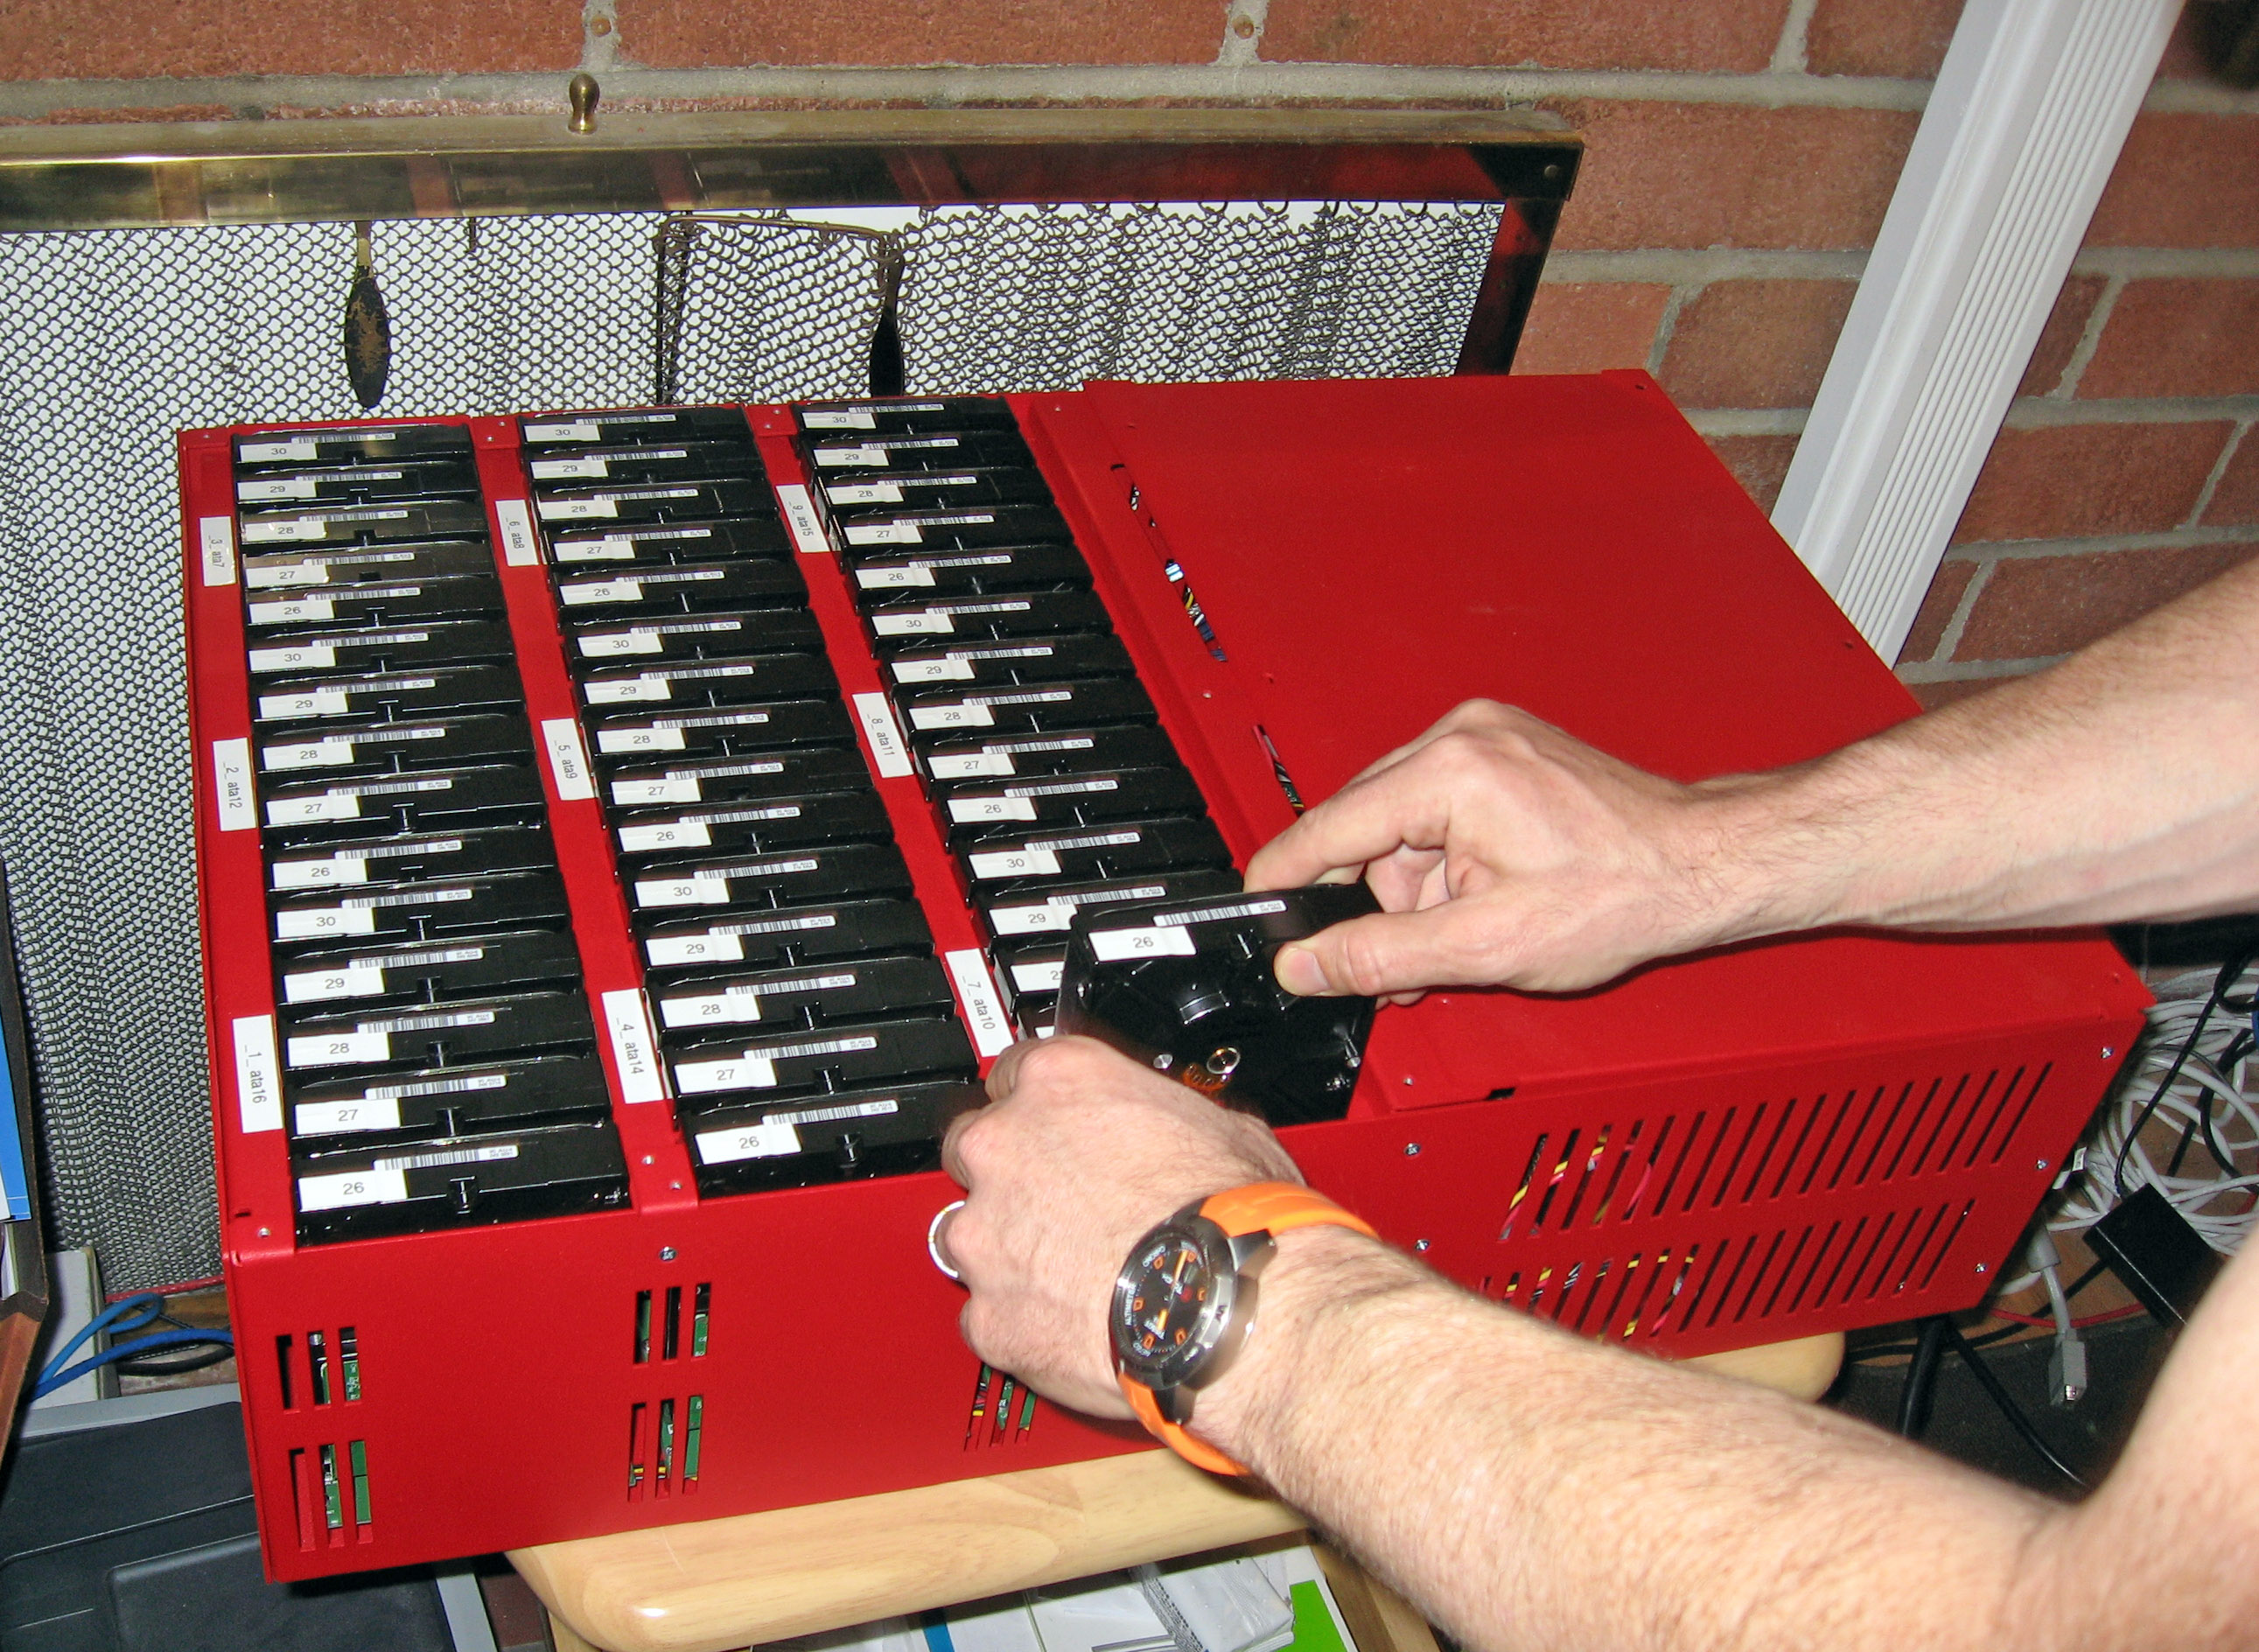
Below you can see how to remove a drive. The top cover plate is installer over half of it.
Below shows a storage pod in a datacenter rack, seen from the top with most of the drives installed. The drives in the center currently run a little warmer than the others at 42 degrees C under maximum load, which is a bit high but still within operating parameters. For our particular application (long term file backup) one pod will fill up with data in a couple of weeks and then become almost completely idle (waiting for a customer to request a restored file) resulting in much cooler long term temperatures. We'll try to increase airflow by the drives near the center in future designs, and also watch the drive failure rates based on their locations inside the case. UPDATE: the drives no longer run warm. We were wiring the fans to the motherboard, and when the motherboard decided it was cool enough it lowered the RPMs of the fans. Now we leave the fans on constant high speed.

The front of the storage pod racked in the datacenter.
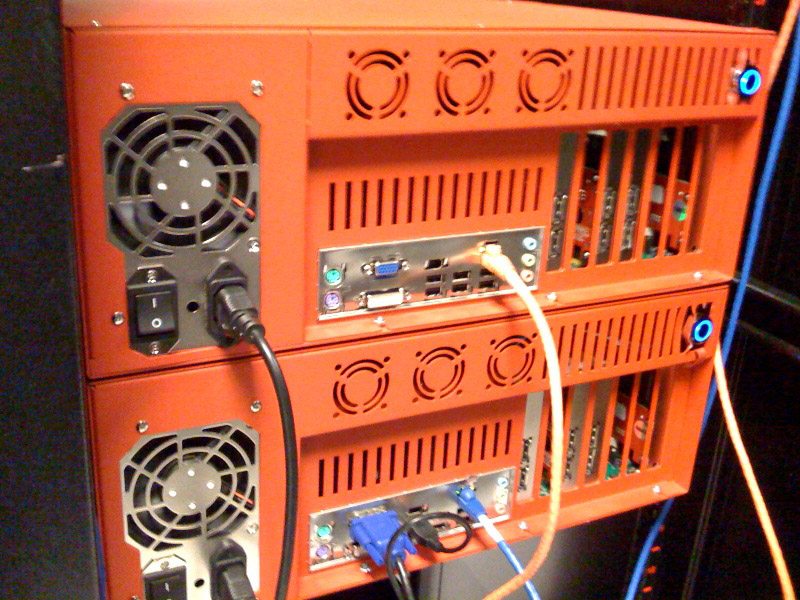
The back of 2 storage pods stacked on top of each other in the datacenter rack. The small blue button in the very upper right corner of the pods is the power button. We forgot to include a hole for the power button in the original case design, so we had to drill it out with a hand drill for the first few pods.
Here is a rack with 6 of them:
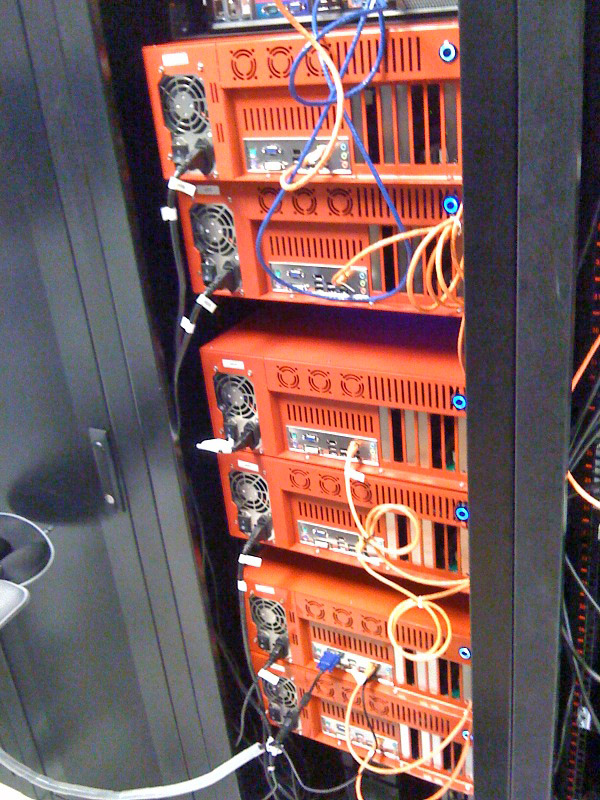
A normal "rack" in a datacenter is 44U (units) high, and so we can put 11 of these storage pods (4U each) in a single rack to get 495 terabytes of drive in one rack. What follows is terribly over-simplified math, but in rough numbers if each Backblaze customer has 50 GB stored on our pods, we can store 10,000 customer's data in one datacenter rack in $77,000 worth of storage pods. If each customer pays $50 / year, that's $500,000 of revenue recurring each year from customers in one rack.
Parts List to Build a Backblaze 45 Terabyte Storage Pod:
- 45 one terabyte 7200 RPM 16MB cache WD10EACS SATA drives ($4,500)
-
1 custom designed 4U Red Pod Enclosure ($800)
- 9 SATA 5 Port Multiplier
Backplanes, CFI-B53PM ($378)
- 1 700W power supply, Zippy PSA-6700P ($300)
- 1 3.3 GHz Core 2 Duo Intel E8600
CPU ($270)
- 1 Intel BOXDG43NB Motherboard
($100)
- 3 PCIe SATA 2-port cards, SIL3132 ($63)
- 4 GB of RAM, 2x2GB
240-Pin DDR2 SDRAM ($61)
- 1 PCI SATA 4-port
card,SIL3124 ($46)
- 1 80GB boot drive, WD800BB 7200 2MB Cache ($40)
- 9 SATA II Cables, 90
degree, with locking ($40)
- 1 Power Switch, Prewired Bulgin Vandal Power
Switch with LED ($29)
- 3
case fans, 120mm Slipstream 1900 RPM, SY1225SL12SH ($24)
- 6 Molex Power
Cable (IDE Power Cable), T-Shaped, one-to-three ($24)
-----------------
Total: $6,675.00
Compare to a "Sun Thumper" (Sun Fire X4540 Server) for $62,000
.
All done! Please email me with any comments.